Ruched ribbon tutorial
Here's a quick and easy way to make ruched ribbon for trimming.
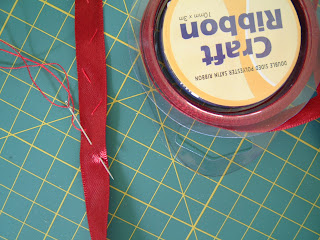
Pick your ribbon - not too stiff is best. You don't need to cut a length as you'll gather the ribbon as you go. Just make sure you have plenty.
Using a matching thread, make zig-zag stitches along the length of the ribbon. The smaller the stitches the neater it'll be, but for a quick gather you can just make a couple of stitches in each zig-zag direction as shown.
Once you have done a few centimetres, pull the thread to gather the ribbon. The tighter you pull, the more the ribbon will gather. Keep doing this until you have enough of the gathered length for whatever you need it for. Don't cut or finish off the ribbon yet.

Once you have gathered your ribbon you can attach it to your piece, making small stitches through the gathered ribbon and your stitched piece. If necessary, you can adjust the gathering further as you go. Once your ribbon is attached you can cut the end and finish it off neatly, making sure the thread you used to do the gathers is firmly finished off too.

The great thing about this method is you can adjust the gathers as you attach the ribbon, and you can add more gathers at the end if you find you have not done enough. There's no ribbon wasted!
Pick your ribbon - not too stiff is best. You don't need to cut a length as you'll gather the ribbon as you go. Just make sure you have plenty.
Using a matching thread, make zig-zag stitches along the length of the ribbon. The smaller the stitches the neater it'll be, but for a quick gather you can just make a couple of stitches in each zig-zag direction as shown.

Once you have done a few centimetres, pull the thread to gather the ribbon. The tighter you pull, the more the ribbon will gather. Keep doing this until you have enough of the gathered length for whatever you need it for. Don't cut or finish off the ribbon yet.

Once you have gathered your ribbon you can attach it to your piece, making small stitches through the gathered ribbon and your stitched piece. If necessary, you can adjust the gathering further as you go. Once your ribbon is attached you can cut the end and finish it off neatly, making sure the thread you used to do the gathers is firmly finished off too.

The great thing about this method is you can adjust the gathers as you attach the ribbon, and you can add more gathers at the end if you find you have not done enough. There's no ribbon wasted!


Bless your heart! Thank you. The clickable pictures are wonderful.
ReplyDeleteI have been wanting to try this!! Thank you so much for the tutorial...the pictures are great!
ReplyDeleteBrilliant tutorial with great instruction of how to 'ruch' the ribbon. I did mine a bit different for my Wabbit but will try your way next time as it looks easier.
ReplyDeleteThanks :-)
thanks for the great instructions. I can't wait to try this out.
ReplyDeleteThanks a lot for this tutorial :)
ReplyDeleteThank you, Nicki, this is so helpful!! I have tried it before in a different way, but this makes much more sense!! Definitely going to try this soon!
ReplyDeleteGreat tutorial, and thanks Nicki.
ReplyDeleteGreat tutorial Nicki! I've added a link to it on the finishing blog :)
ReplyDeleteThank you, Nicki! :)
ReplyDeleteI kind of fumble-figred this out for myself on Niek's Christmas gift, but your directions would've been a great help. Especially that simple picture of the zig-zag stitch, which I simply didn't "get" when I was trying to figure it out before. ;)
ReplyDeleteGreat tutorial!
ReplyDeleteThanks Nicki! That is fantastic!
ReplyDeleteThanks Nicki, your tutorial is great! I am going to have to try this.
ReplyDeleteThank you, Nicki! I'll have to try this soon!
ReplyDeleteThanks so much for your wonderful tips! I especially like how you can adjust the ribbon as you go and not waste any! :D
ReplyDelete