Ruched ribbon tutorial
Here's a quick and easy way to make ruched ribbon for trimming.
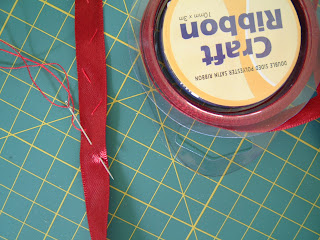
Pick your ribbon - not too stiff is best. You don't need to cut a length as you'll gather the ribbon as you go. Just make sure you have plenty.
Using a matching thread, make zig-zag stitches along the length of the ribbon. The smaller the stitches the neater it'll be, but for a quick gather you can just make a couple of stitches in each zig-zag direction as shown.
Once you have done a few centimetres, pull the thread to gather the ribbon. The tighter you pull, the more the ribbon will gather. Keep doing this until you have enough of the gathered length for whatever you need it for. Don't cut or finish off the ribbon yet.

Once you have gathered your ribbon you can attach it to your piece, making small stitches through the gathered ribbon and your stitched piece. If necessary, you can adjust the gathering further as you go. Once your ribbon is attached you can cut the end and finish it off neatly, making sure the thread you used to do the gathers is firmly finished off too.

The great thing about this method is you can adjust the gathers as you attach the ribbon, and you can add more gathers at the end if you find you have not done enough. There's no ribbon wasted!
Pick your ribbon - not too stiff is best. You don't need to cut a length as you'll gather the ribbon as you go. Just make sure you have plenty.
Using a matching thread, make zig-zag stitches along the length of the ribbon. The smaller the stitches the neater it'll be, but for a quick gather you can just make a couple of stitches in each zig-zag direction as shown.

Once you have done a few centimetres, pull the thread to gather the ribbon. The tighter you pull, the more the ribbon will gather. Keep doing this until you have enough of the gathered length for whatever you need it for. Don't cut or finish off the ribbon yet.

Once you have gathered your ribbon you can attach it to your piece, making small stitches through the gathered ribbon and your stitched piece. If necessary, you can adjust the gathering further as you go. Once your ribbon is attached you can cut the end and finish it off neatly, making sure the thread you used to do the gathers is firmly finished off too.

The great thing about this method is you can adjust the gathers as you attach the ribbon, and you can add more gathers at the end if you find you have not done enough. There's no ribbon wasted!

